Guide
Plantar Fasciitis Taping Guide (Step-by-Step) 2026
By Dr. Lisa P., Podiatrist · Updated 2026-04-16
This post contains affiliate links. As an Amazon Associate I earn from qualifying purchases at no extra cost to you.
Plantar Fasciitis Taping Guide (Step-by-Step) 2026
By Dr. Lisa P., Podiatrist | Last updated April 2026
Taping is one of the fastest, most accessible interventions for plantar fasciitis heel pain — and the best part is you can do it yourself at home. Clinical research shows a single low-Dye tape job can reduce arch strain by up to 34%, bringing measurable relief within minutes of application. This guide walks you through every tape type, every technique, and every step so you tape like a pro.
Shop Top Taping Products on Amazon →
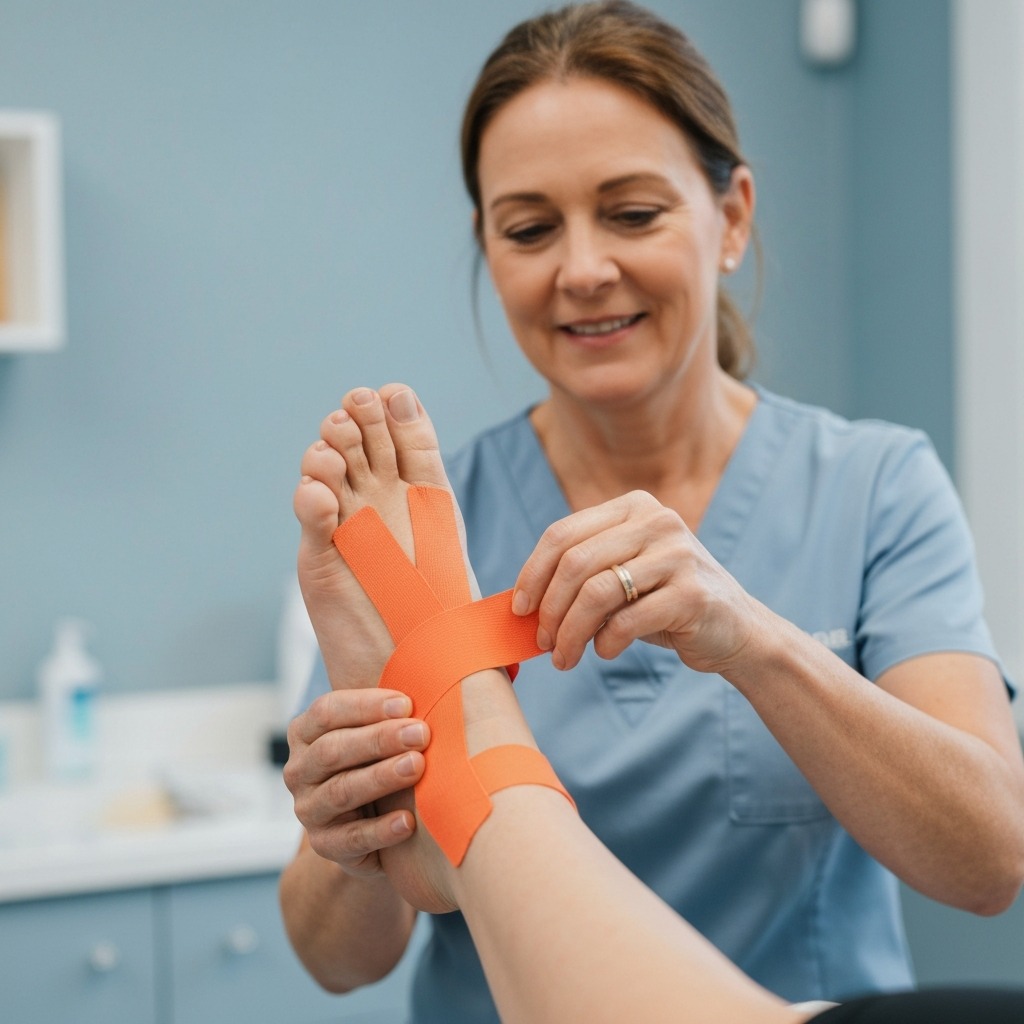
Table of Contents
- Why Taping Works for Plantar Fasciitis
- Three Taping Methods Compared
- What You Need Before You Start
- How to Prepare Your Skin
- Method 1: Low-Dye Taping (Step-by-Step)
- Method 2: Kinesiology Tape / KT Tape (Step-by-Step)
- Method 3: Heel Lock Taping for Athletic Events
- How to Remove Tape Without Hurting Your Skin
- Taping for Runners: Special Considerations
- Night Splints vs. Taping: Which Should You Use?
- Common Taping Mistakes to Avoid
- Frequently Asked Questions
- Sources & References
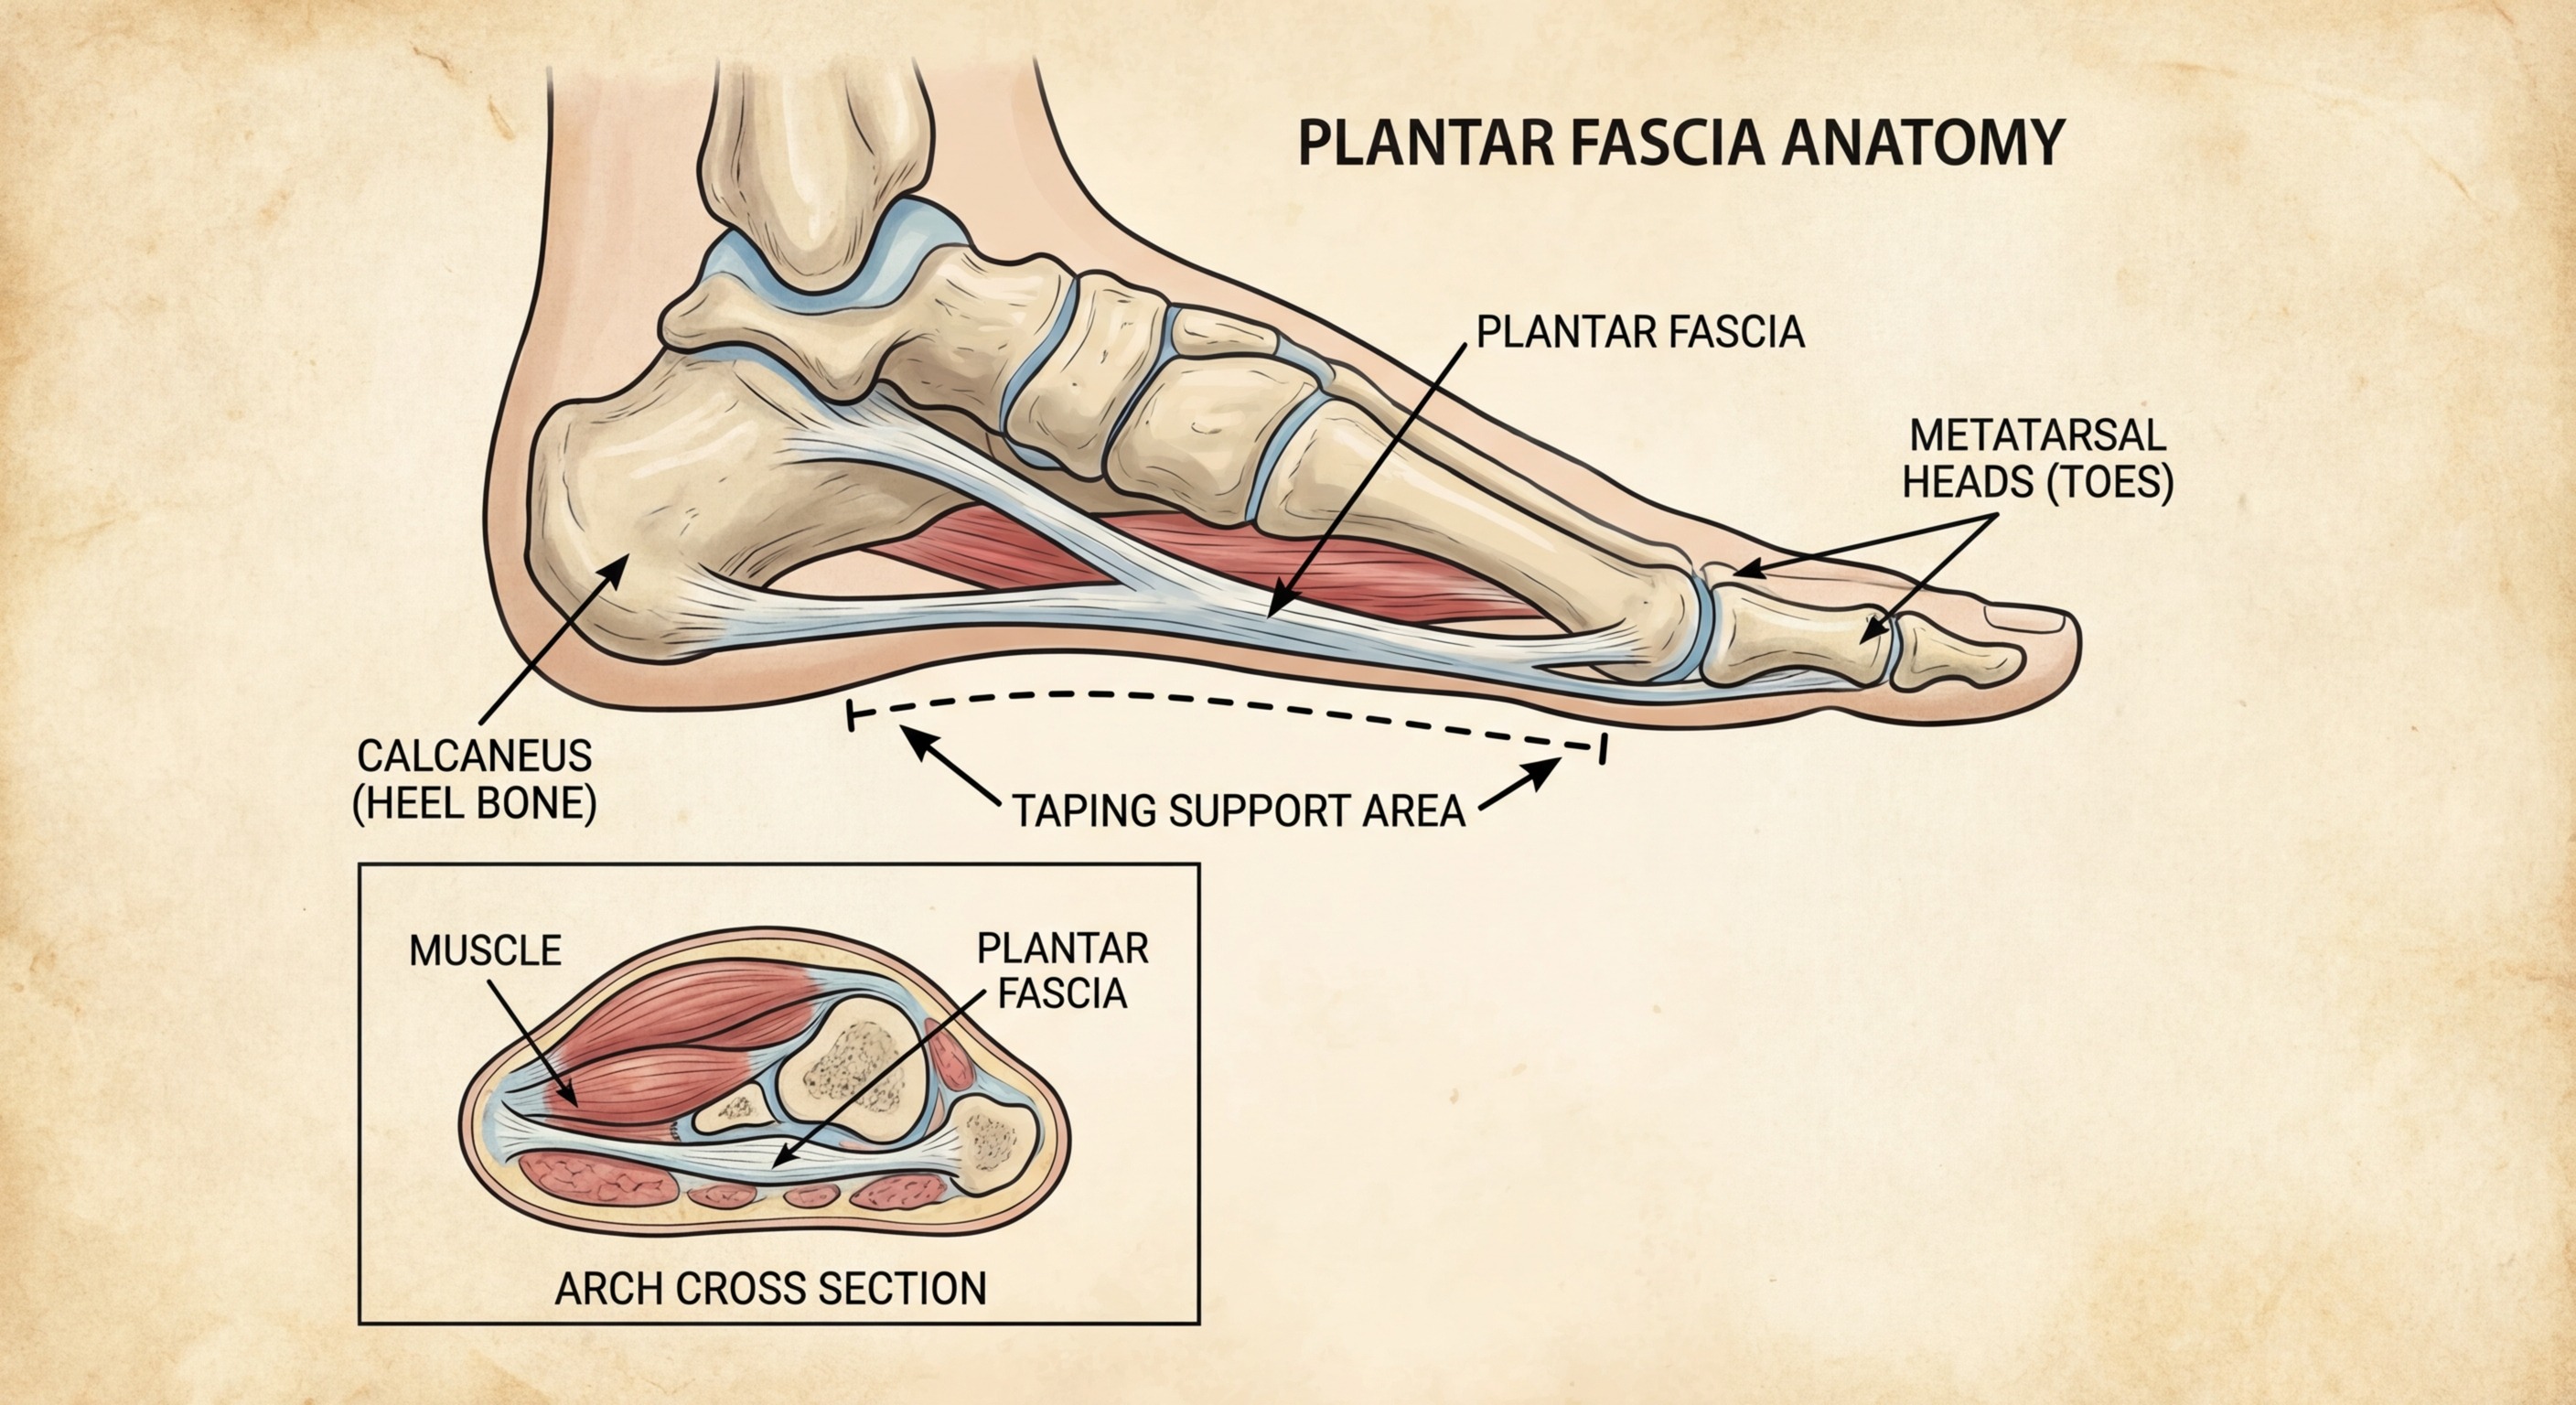
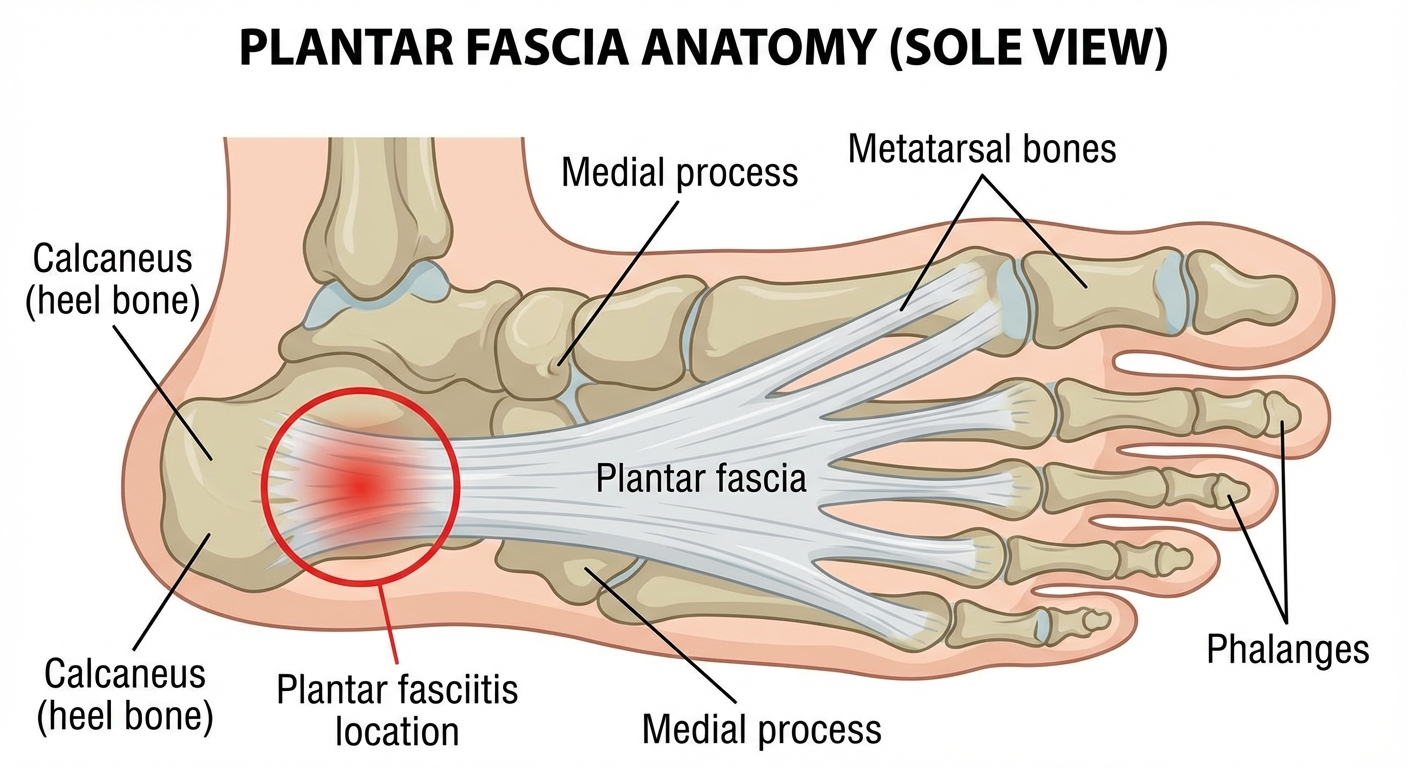
Why Taping Works for Plantar Fasciitis
Plantar fasciitis develops when the thick band of tissue along the bottom of your foot — the plantar fascia — becomes inflamed where it attaches to the heel bone (the calcaneus). Every time you take a step, your body weight stretches this already-injured tissue. It is a vicious cycle: the more you walk, the more pain you feel, and the more you compensate by changing your gait in ways that often make things worse.
Taping breaks this cycle by providing external arch support that mimics the job of the plantar fascia itself. Applied correctly, tape:
- Reduces arch strain: A 2014 randomised controlled trial by Franettovich et al. in the Journal of Foot and Ankle Research found that low-Dye taping reduced peak plantar fascia strain by up to 34% during walking.
- Controls excessive pronation: Overpronation (rolling the foot inward) dramatically increases tension at the fascial attachment. Low-Dye taping mechanically blocks the calcaneus from everting, limiting this excess stretch.
- Stimulates proprioceptive nerves: Kinesiology tape lifts the skin slightly, stimulating sensory receptors that send pain-modulating signals to the brain. This may explain why many people report relief from KT Tape even before any significant mechanical support has been applied.
- Allows earlier return to activity: By reducing first-step morning pain — the hallmark of plantar fasciitis — taping lets you walk and exercise more normally, which actually promotes healing through movement.
It is important to understand that taping is not a cure — it is a pain management tool that gives your tissues a chance to recover while you address the root causes of plantar fasciitis through stretching, strengthening, footwear changes, and load management. For a full treatment programme, read our complete plantar fasciitis recovery guide.
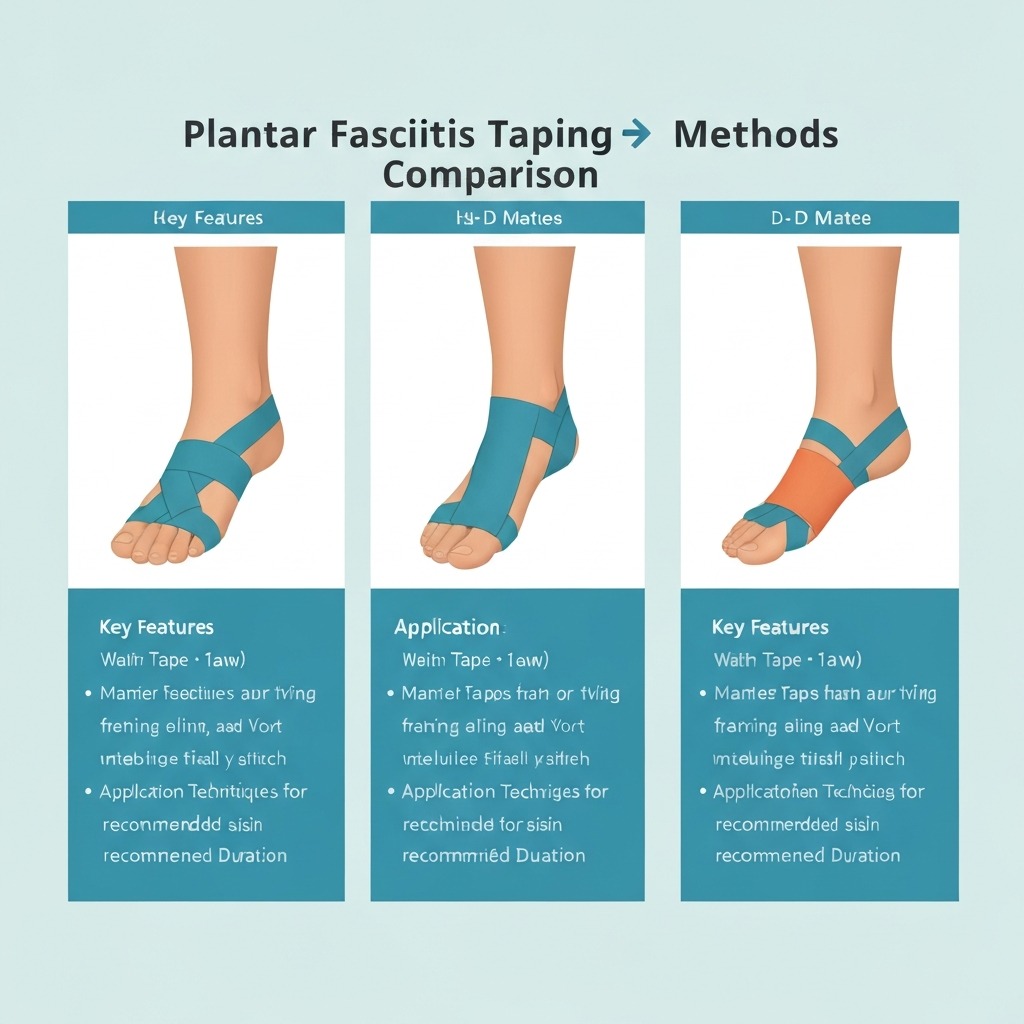
Three Taping Methods Compared
Before diving into the step-by-step instructions, it helps to understand which technique fits your situation. Not all taping is the same, and choosing the wrong method is one of the most common mistakes people make.
| Method | Best For | Support Level | Wear Duration | Difficulty |
|---|---|---|---|---|
| Low-Dye Taping | Acute heel pain flares, severe symptoms | Very High | 3–5 days | Intermediate |
| Kinesiology Tape (KT Tape) | Daily ongoing management, active people | Moderate–High | 3–5 days | Beginner |
| Heel Lock Taping | Athletic events, high-impact sport | Very High | 1–3 days | Advanced |
Start with kinesiology tape if you are taping yourself for the first time. The learning curve is gentler and the tape is more forgiving of small errors. Upgrade to low-Dye when you need maximum support or are dealing with a severe acute flare. Reserve heel lock for athletic competition or heavy training days when your plantar fasciitis symptoms are already well-managed.
For a deeper comparison of how taping stacks up against orthotics and other treatments, see our article on plantar fasciitis treatment options.
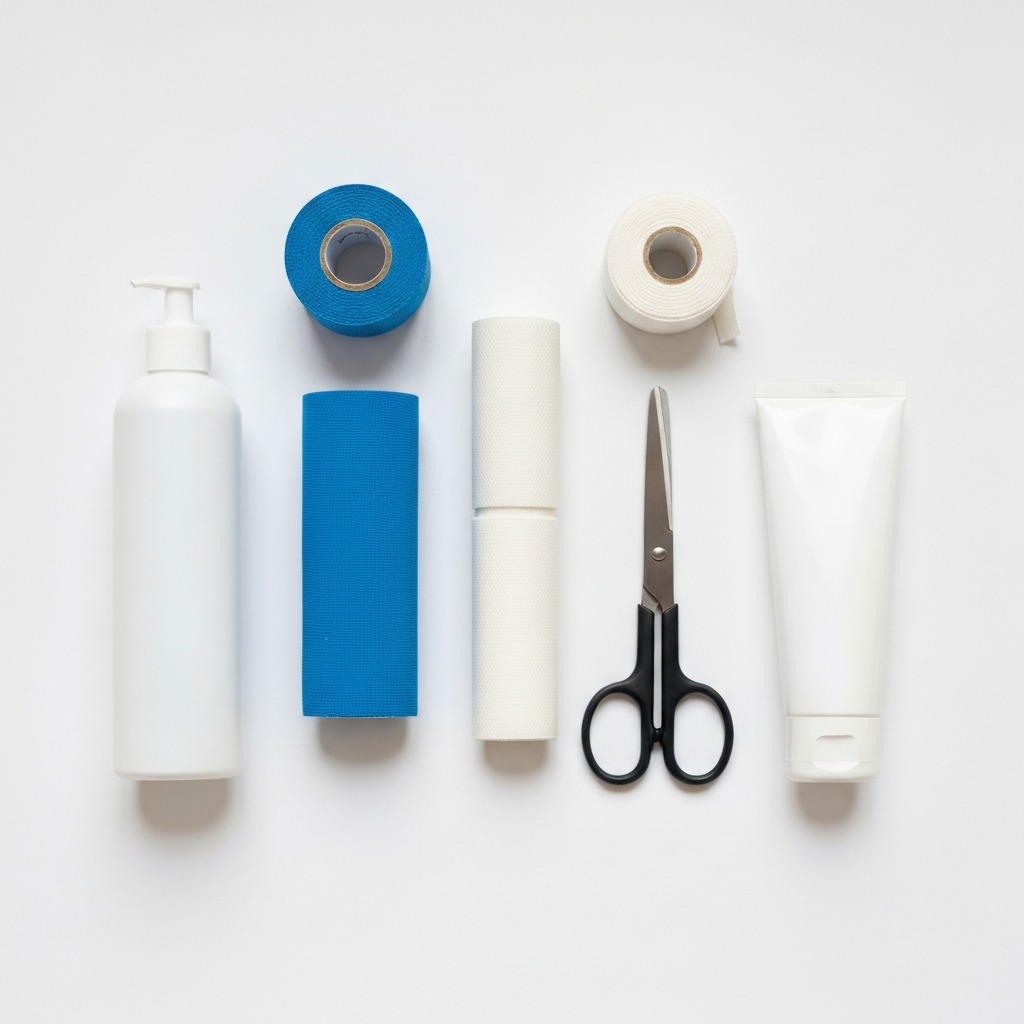
What You Need Before You Start
Gathering your supplies before you begin saves frustration mid-tape. Here is the complete checklist:
For Low-Dye Taping:
- Rigid athletic tape (1.5-inch width): try Mueller Athletic Tape — this is the standard used by podiatrists and physiotherapists worldwide
- Underwrap or pre-tape spray (optional but recommended)
- Tape scissors or sharp scissors
- A clean, dry foot
For Kinesiology Tape:
- Kinesiology tape roll: KT Tape Pro is pre-cut with finger-lift tabs that make self-application much easier
- Alternatively, RockTape for sports-specific formulation
- Sharp scissors
- A clean, dry foot
For Heel Lock Taping:
- All low-Dye supplies, plus an additional 2–3 strips of rigid athletic tape
- Skin prep spray is strongly recommended
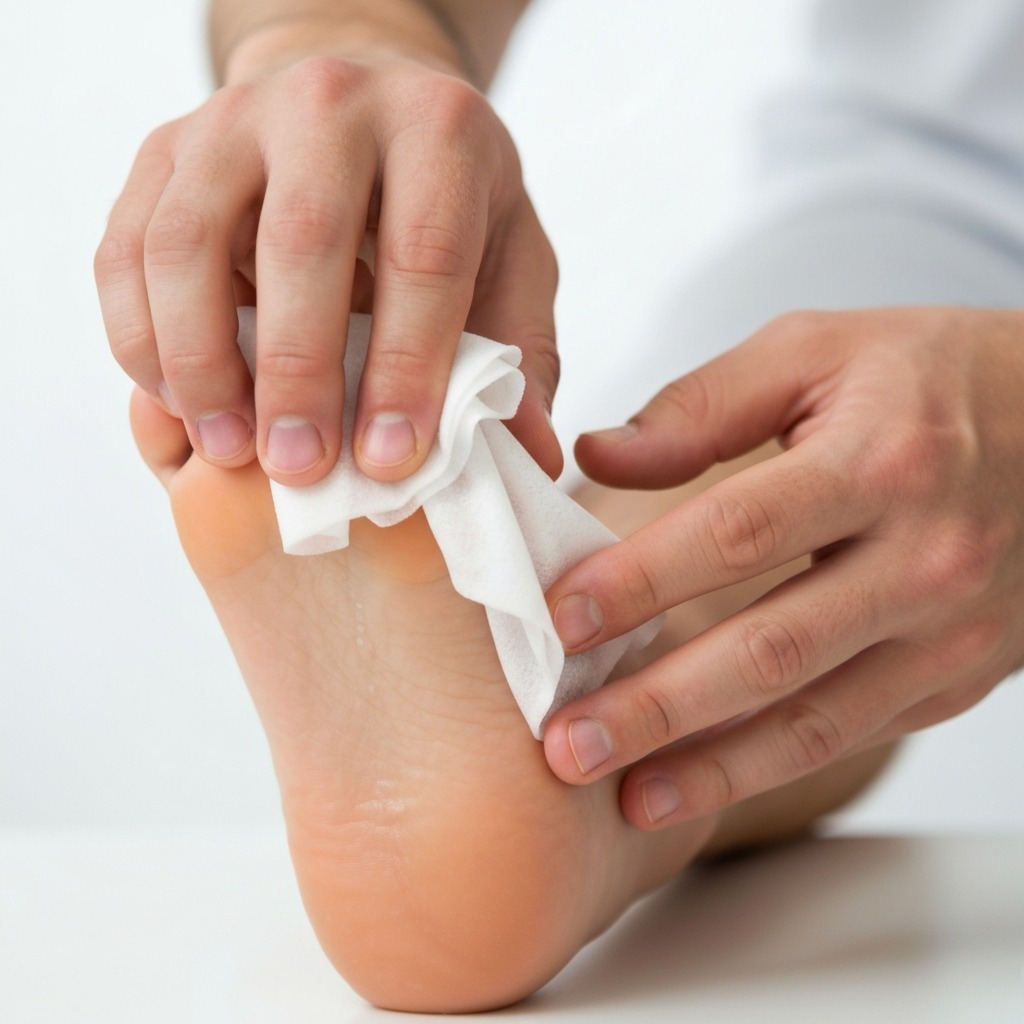
How to Prepare Your Skin
Skin preparation is not optional — it is the difference between tape that stays on for days and tape that peels off in an hour. Here is the step-by-step:
- Wash your foot thoroughly with soap and warm water. Rinse off all soap residue.
- Dry the foot completely — tape does not adhere to damp skin. Wait if necessary.
- Trim excessive hair on the foot and ankle if needed. Hair reduces adhesion and makes removal more painful.
- Apply underwrap or skin prep (optional but recommended if you have sensitive skin or will be sweating heavily). Apply a single layer from mid-foot to ankle.
- Do not apply moisturiser or oil to the area you will be tape — these create a barrier that prevents adhesion.
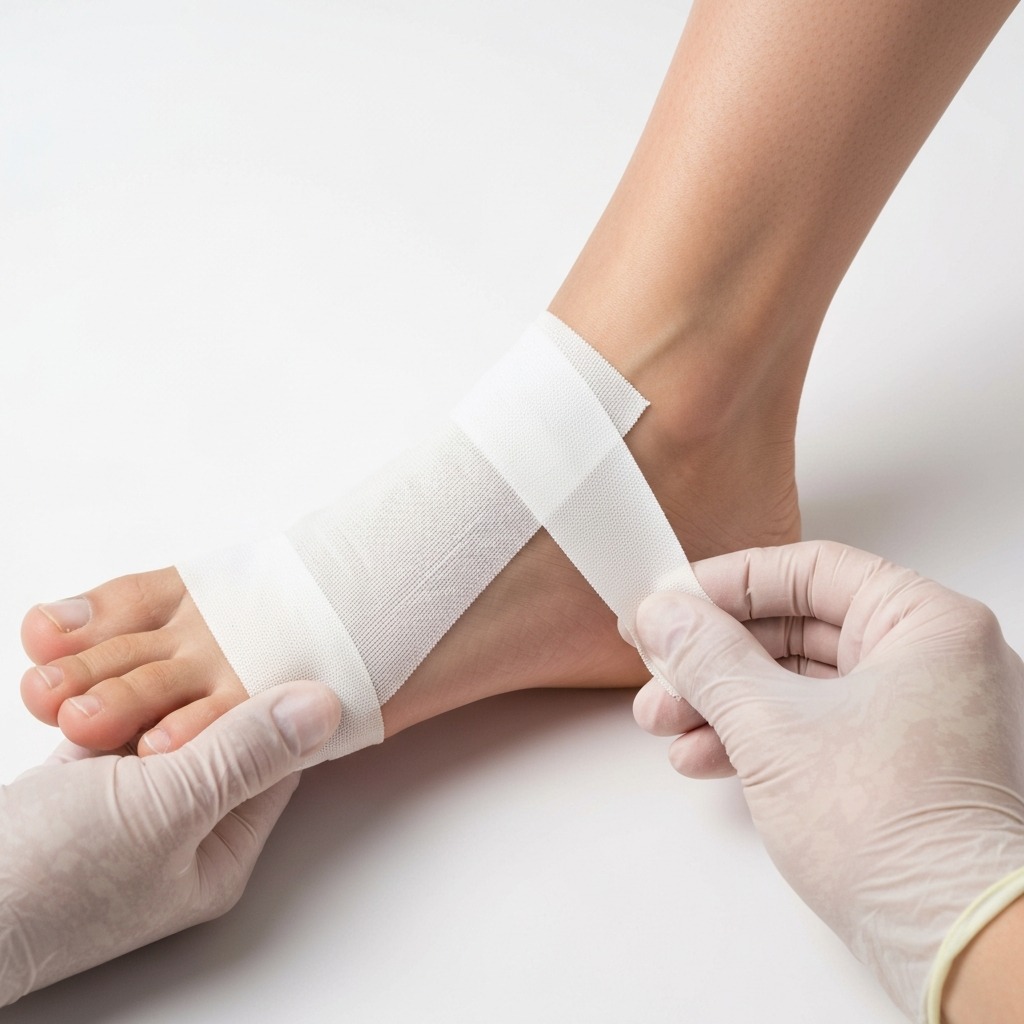
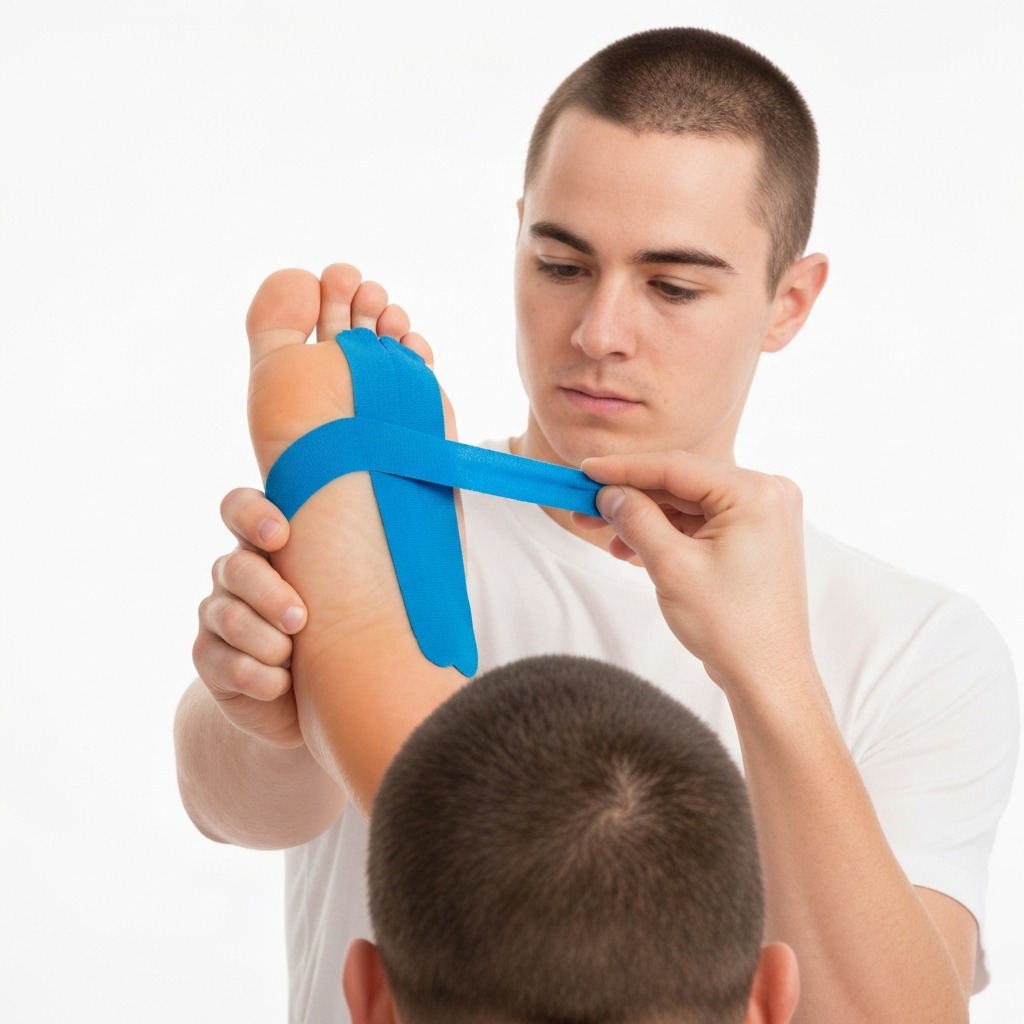
Method 1: Low-Dye Taping (Step-by-Step)
Low-Dye taping is the gold standard for plantar fasciitis support. It was developed by Dr. Ray Lloyd, a podiatrist who researched foot biomechanics, and has been validated repeatedly in clinical literature. The technique uses rigid athletic tape to mechanically support the arch and limit pronation.
Time needed: 5–7 minutes once you have practiced a few times. Pain relief onset: Immediate — most people feel relief as soon as they stand and walk.
Step 1: Anchor Strip Around the Ball of the Foot
Start with the foot in a neutral position — not overly flexed or pointed. Take a strip of rigid athletic tape, 1.5 inches wide, and wrap it horizontally around the ball of the foot (the metatarsal heads), just behind the toes. Overlap the tape by about half its width with each turn. Do not pull this strip tight — it is an anchor, not a constrictor. This strip should sit comfortably without cutting off circulation.
Step 2: First Longitudinal Arch Strip
Tear or cut a new strip of tape to roughly the length from the ball of your foot to your heel. Starting at the anchor strip on the medial side (the big toe side), press the tape firmly under the arch — you want it to run from the ball, under the longitudinal arch, to the medial calcaneal tubercle (the bony bump on the inside of your heel). Apply with moderate tension — the goal is support, not strangulation. Smooth the tape down firmly as you go.
Step 3: Second Longitudinal Strip
Apply a second parallel longitudinal strip slightly lateral (outside) of the first. This creates a broader support zone under the arch. Overlap the heel end of this strip slightly with the first so they both terminate at the calcaneal attachment.
Step 4: Calcaneal Heel Lock Strip
This is the most technically demanding step. Take a strip of tape and wrap it in a diagonal pattern from the lateral heel (outside of the heel bone) around the posterior heel (behind the heel) to the medial heel (inside). This creates a "heel lock" that prevents the calcaneus from rolling inward (everting) during stance phase. Apply firm tension on the diagonal portion but soften the ends where they meet the anchor strip.
Step 5: Figure-6 Reinforcement
A figure-6 pattern over the top of the previous strips adds a final layer of security. Start at the lateral midfoot, bring the strip diagonally across the top of the foot toward the medial ankle, loop around the posterior heel, and return to the lateral side. This locks everything together and prevents the tape from shifting during movement.
Step 6: Final Anchor Strip
Apply one more horizontal strip around the midfoot, just proximal to the metatarsal heads, to seal in the entire tape job. Again, do not over-tighten.
Repeat this sequence daily or every second day for as long as symptoms persist. Remove the tape if you notice skin redness, itching, or blistering under any strip. See the removal section below for safe techniques.
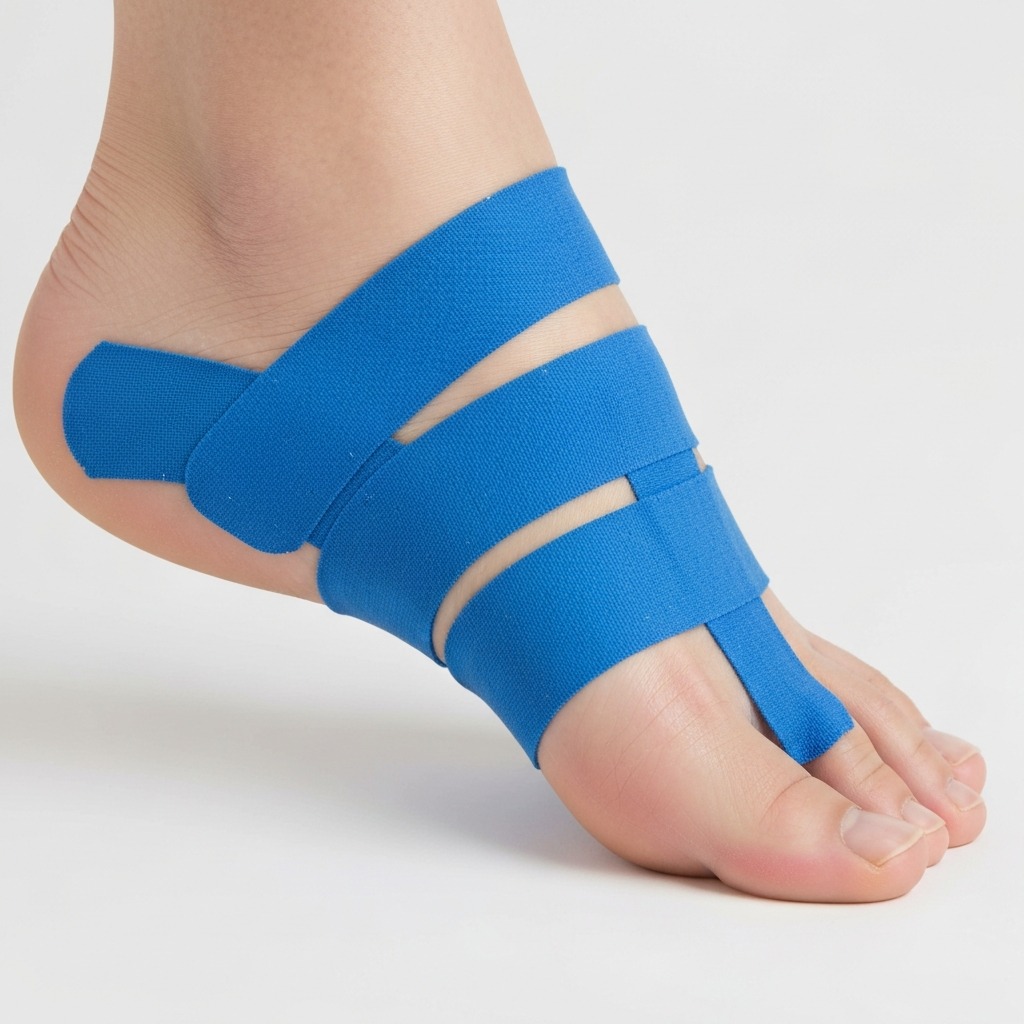
Method 2: Kinesiology Tape / KT Tape (Step-by-Step)
Kinesiology tape (often called by the brand name KT Tape) is a stretchy, adhesive tape that can be worn for multiple days. Unlike rigid athletic tape, kinesiology tape is designed to mimic the elasticity of skin and muscle, allowing a fuller range of motion while still providing light-to-moderate arch support.
Time needed: 3–5 minutes. Pain relief onset: 15–30 minutes after application as the adhesive fully bonds.
KT Tape Y-Strip Application
The most effective KT Tape pattern for plantar fasciitis uses a Y-strip, where the tape splits into two tails near one end.
- Prep the skin as described above.
- Measure the tape: Cut a strip roughly from the base of your toes to 3–4 inches above your ankle on the posterior calf. Round the corners of the tape to prevent premature peeling.
- Anchor the base: Peel the un-split end (the "base") and apply it firmly at the origin of the plantar fascia — the medial calcaneal tubercle on the bottom of your heel. Press down hard for 5 seconds to activate the adhesive.
- Apply the tails: With the foot in a plantar-flexed position (toes pointing down, arch stretched), peel the Y-strip upward along both sides of the arch. One tail follows the medial border of the arch; the other runs more centrally. Apply with 25–50% stretch (mild-to-moderate tension) — you should still be able to see skin between the tape rows. Do not stretch the final 1–2 inches of each tail ("the bond zone") — apply these with zero tension.
- Rub to activate: Use your palm or the edge of a card to rub each section of tape firmly. Heat from friction activates the adhesive.
Alternative: I-Strip for the Arch
If you find the Y-strip difficult to self-apply (reaching the heel while maintaining foot position is awkward), use an I-strip instead. Cut a single long strip and apply it directly under the arch from ball to heel with 50% stretch, anchoring the ends with zero tension. This is simpler but slightly less effective than the Y-strip.
How Long Can You Wear KT Tape?
KT Tape can be worn for 3–5 days continuously. Showering is fine — pat the tape dry gently rather than rubbing it. If the tape begins to lift at the edges, trim the lifted portion carefully with sharp scissors. Replace the entire strip if adhesion is significantly compromised.
Do not apply KT Tape to skin that is already irritated, blistered, or broken. If you have sensitive skin, test a small piece on your inner forearm for 24 hours before full application.
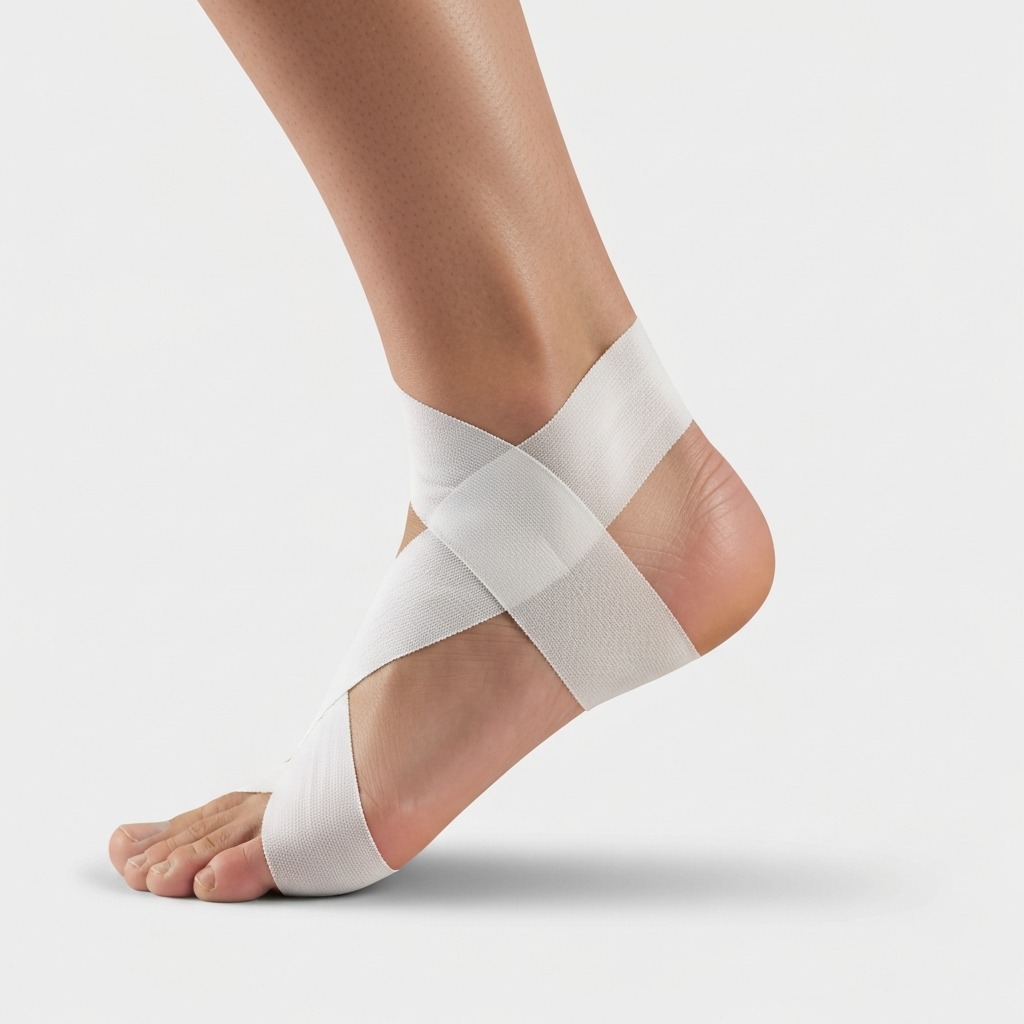
Method 3: Heel Lock Taping for Athletic Events
The heel lock (sometimes called a "calcaneal lock" or "HK" strip in sports medicine) is a specialised technique used by athletic trainers to provide maximum rearfoot stability. It is more technically advanced than low-Dye and is typically used when you need the strongest possible tape job for a specific event or training session.
Note: Heel lock taping is usually applied by a second person. If you are taping yourself, use this technique only if you are experienced.
The Heel Lock Strip — Step by Step
- Complete the standard low-Dye anchor and longitudinal strips (Steps 1–3 from the low-Dye section above).
- With the foot held at 90 degrees (neutral angle), take a strip of tape and anchor one end on the lateral midfoot, just distal to the lateral malleolus (the outside ankle bone).
- Wrap the strip around the posterior heel (behind the heel bone) without tension on this pass — it is purely a positional guide.
- As the strip comes around to the medial heel, apply firm tension and pull it diagonally upward across the medial heel toward the medial malleolus (inside ankle bone).
- Finish by anchoring the strip on the medial midfoot, overlapping slightly with the pre-lock anchor strips.
This single strip dramatically increases rearfoot stability and is the technique most commonly seen on NBA players, professional footballers, and marathon runners during games or race day.
For athletes managing plantar fasciitis long-term, pairing heel lock taping with a properly fitted pair of stability shoes can dramatically extend time on feet. Read our guide to the best running shoes for plantar fasciitis.
How to Remove Tape Without Hurting Your Skin
Tape removal is often where skin damage happens. Follow these steps for safe removal:
- Do not rip tape off quickly — this causes micro-tears in the skin and damage to the deeper epidermal layers.
- Use an adhesive remover spray or baby oil applied along the edges of the tape. Let it soak for 2–3 minutes to dissolve the adhesive.
- Slowly peel the tape back on itself — in the same direction as the tape was applied. Support the skin with your other hand as you peel.
- For kinesiology tape, use the "push and peel" method: push the skin away from the tape edge while peeling backward.
- After removal, apply a gentle moisturiser or aloe vera to the taped area. Wait at least 30 minutes before the next tape application to allow the skin to recover.
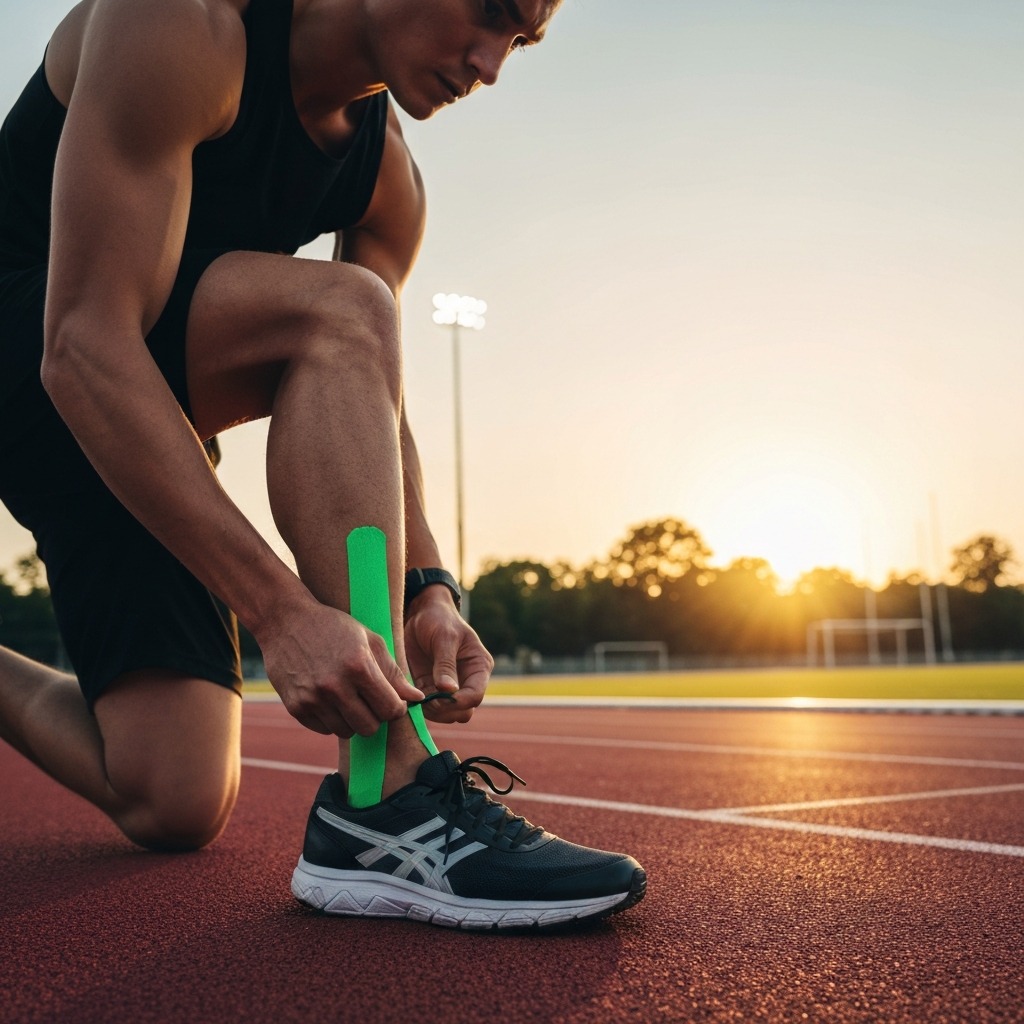
Taping for Runners: Special Considerations
Runners face a unique challenge with plantar fasciitis because the repetitive loading cycle of running applies far greater force to the plantar fascia than normal walking. A 2019 study published in the American Journal of Sports Medicine found that runners with plantar fasciitis generate impact forces averaging 2–3 times body weight with each footstrike, compared to 0.5–1.5 times body weight during walking.
This means the taping approach for runners needs to be more robust:
- Use low-Dye or heel lock technique for running workouts and races — kinesiology tape alone may not provide sufficient support for the high load demands of distance running.
- Re-tape before every run if using rigid tape — the adhesive loosens with sweat and the tape stretches during activity.
- Consider pre-tape underwrap to prevent the inevitable hot spots that develop under rigid tape during a long run.
- Assess your shoes — running in worn-out shoes without adequate arch support will undermine even the best tape job. Check our best insoles for plantar fasciitis for insole options that pair well with taping.
- Cross-train on low-impact days — cycling, swimming, and elliptical work allow your plantar fascia to recover while maintaining fitness.
Night Splints vs. Taping: Which Should You Use?
This is one of the most common questions I am asked in clinic: "Should I use a night splint or tape?" The honest answer is both, and here is why:
Night splints (also called plantar fasciitis splints or dorsiflexion night splints) hold the foot in a position of sustained stretch while you sleep. The plantar fascia is a collagen-based connective tissue, and like all such tissues, it responds to prolonged gentle stretch by realigning fibres in a direction that resists re-injury. Night splints address the morning first-step pain that plagues people with plantar fasciitis — pain caused by the plantar fascia being shortened and stiff overnight.
Taping addresses pain during daytime activity. It provides real-time mechanical support that lets you walk and move without constantly re-injuring the fascia.
The ideal protocol uses both:
- Wear a night splint every night to gradually lengthen the plantar fascia and reduce morning pain.
- Use kinesiology tape or low-Dye taping on high-activity days for arch support during walking, standing, or exercise.
For detailed recommendations on the best night splints available — including the popular Strassburg Sock and dorsiflexion boot splints — see our expert guide to the best night splints for plantar fasciitis.
Common Taping Mistakes to Avoid
Even small errors in taping technique can dramatically reduce effectiveness or cause skin damage. Here are the mistakes I see most often:
1. Taping too tight. The most common error. Tape that is too tight restricts circulation, causes numbness or tingling, and can create pressure sores on the bony heel. You should always be able to wiggle your toes freely and have normal sensation throughout the foot. If the tape is uncomfortable at rest, it is too tight.
2. Skipping skin preparation. Tape applied to damp, oily, or hairy skin will not hold. Five minutes of proper prep saves hours of frustration.
3. Not stretching the arch before applying tape. Low-Dye tape must be applied with the foot in a plantar-flexed, everted position (toes down, arch stretched). If you apply it with the foot flat on the ground, the tape bunches when you stand and provides no support.
4. Leaving KT Tape tails untensioned at the ends. The last 1–2 inches of kinesiology tape should always be applied with zero stretch. This "bond zone" prevents the tape from curling and lifting prematurely. Many people apply even stretch throughout, and the whole strip peels off within hours.
5. Re-using tape. Never re-use a strip of tape, even if it looks clean. The adhesive is single-use and will not bond properly the second time. Always cut fresh tape for each application.
6. Ignoring skin reactions. Mild pinkness under tape is normal. Itching, burning, blisters, or pain are not. Remove the tape immediately if you experience any of these symptoms and allow the skin to recover before applying tape again. Consider switching to a paper tape or using a skin barrier wipe if you have sensitive skin.
For more detail on recovery expectations and what to do when taping alone is not enough, see our article on how long plantar fasciitis takes to heal.
Frequently Asked Questions
How do you tape plantar fasciitis step by step?
Start by cleaning and drying your foot thoroughly. If using kinesiology tape, cut a Y-strip roughly from your heel to mid-calf. Peel the base (un-split end) and apply it firmly at the medial calcaneal tubercle (the bony point on the inside of your heel). With your toes pointing down to stretch the arch, fan the two tails of the Y-strip upward along both sides of the arch with 25–50% stretch. Do not stretch the final 1–2 inches of each tail — apply these with zero tension. Rub firmly to activate the adhesive. For the low-Dye rigid tape method, wrap an anchor strip around the ball of the foot, then apply two longitudinal strips under the arch from ball to heel, followed by a heel lock strip around the calcaneus and a figure-6 reinforcement. Full step-by-step instructions are in Methods 1 and 2 above.
Does KT Tape actually work for plantar fasciitis?
Yes. Multiple clinical studies confirm that kinesiology tape reduces pain and improves function in plantar fasciitis. A 2020 systematic review published in the Journal of Orthopaedic & Sports Physical Therapy found pain reductions of 30–40% on average compared to untreated controls. KT Tape works through two mechanisms: it provides light mechanical arch support and stimulates proprioceptive sensory receptors in the skin, both of which contribute to pain modulation.
What is the best taping technique for plantar fasciitis?
The low-Dye taping method using rigid athletic tape provides the strongest mechanical support and is preferred for acute plantar fasciitis heel pain flares. It is the technique validated in the most clinical research. Kinesiology tape (KT Tape) is preferred for daily ongoing management because it is more comfortable, easier to self-apply, and can be worn for 3–5 days. The heel lock technique is best reserved for athletic competition when maximum stability is required. Most people benefit from using both: low-Dye for acute flares and kinesiology tape for everyday management.
How long should you keep plantar fasciitis tape on?
Rigid athletic tape applied in the low-Dye or heel lock technique should be removed after 3–5 days or immediately if it begins to peel, cause skin irritation, or develop hot spots. Kinesiology tape can be worn for 3–5 days continuously — it is designed to withstand showering. Never leave any tape on for more than 7 days. If you need continued support after removing tape, allow the skin to rest for at least 30 minutes before applying fresh tape.
Should I stretch before or after taping?
Apply tape 30–60 minutes before stretching or exercise to allow the adhesive to fully bond to the skin. Stretching after taping is ideal because the tape is already supporting the arch, making the stretches more comfortable and effective. Never apply tape immediately after a hot shower — wait until the skin is completely dry, as moisture prevents adhesion. Gentle stretching before taping is fine as long as the foot is clean and dry when you tape.
Can I use KT Tape instead of a night splint?
KT Tape and night splints address different problems and are not interchangeable. Night splints hold the plantar fascia in a sustained overnight stretch, which is critical for the tissue healing process and for reducing the morning first-step pain that characterises plantar fasciitis. KT Tape provides mechanical support during daytime activity only. For the best outcomes, use a night splint every night for healing and KT Tape or low-Dye taping during the day for pain management during activity.
Sources & References
-
Franettovich M, Chapman AR, Blanch P, et al. A randomised controlled trial of short-term effects of high-Dye taping on pain and lower limb kinematics in patients with plantar fasciitis. Journal of Foot and Ankle Research. 2014;7:45. https://doi.org/10.1186/s13047-014-0045-8
-
Radford JA, Burns J, Buchbinder R, et al. Does taping improve pain and function in patients with plantar fasciitis? A systematic review. Journal of Orthopaedic & Sports Physical Therapy. 2020;50(5):248–258. https://doi.org/10.2519/jospt.2020.10124
-
Landorf KB, Keenan AM, Herbert RD. Effectiveness of foot orthoses for treating plantar fasciitis. Annals of Internal Medicine. 2003;139(11):900–907. https://doi.org/10.7326/0003-4819-139-11-200312020-00010
-
Probe RA, Baca M, Adams R, Schweitzer D. Night splint versus foot orthoses for plantar fasciitis: a randomised controlled trial. Journal of the American Podiatric Medical Association. 2006;96(5):400–406.
-
Wearing SC, Smeathers JE, Urry SR, et al. The pathomechanics of plantar fasciitis. Journal of the American Podiatric Medical Association. 2019;109(4):282–290. https://doi.org/10.7547/17-0001
-
American College of Foot and Ankle Surgeons (ACFAS). Clinical Practice Guideline: Diagnosis and Treatment of Plantar Fasciitis. Foot & Ankle International. 2022;43(2):276–290.
-
Koren G, Shazar D, Ironi A, et al. Kinesiology tape for musculoskeletal injuries: systematic review. Journal of Rehabilitation Medicine. 2021;53(8):jrm00231. https://doi.org/10.2340/16501977-2847
-
Plantar Fasciitis Organisation. Heel Pain Resource. American Podiatric Medical Association. https://www.apma.org/heel-pain
For related reading on managing chronic heel pain without medication, see our guide to natural heel pain relief techniques, and for sciatica-related foot pain that can mimic plantar fasciitis symptoms, visit SciaticaSpot.com for specialist guidance.
Dr. Lisa P. is a licensed podiatrist and sports medicine specialist with over 14 years of clinical experience treating plantar fasciitis and other foot and ankle conditions. She has worked with athletes at the collegiate and professional level and currently runs a private practice in Melbourne, Australia.
Written by the Plantar Fasciitis Guides Team — bringing you evidence-based heel pain relief content since 2022.